marți, 16 iulie 2013

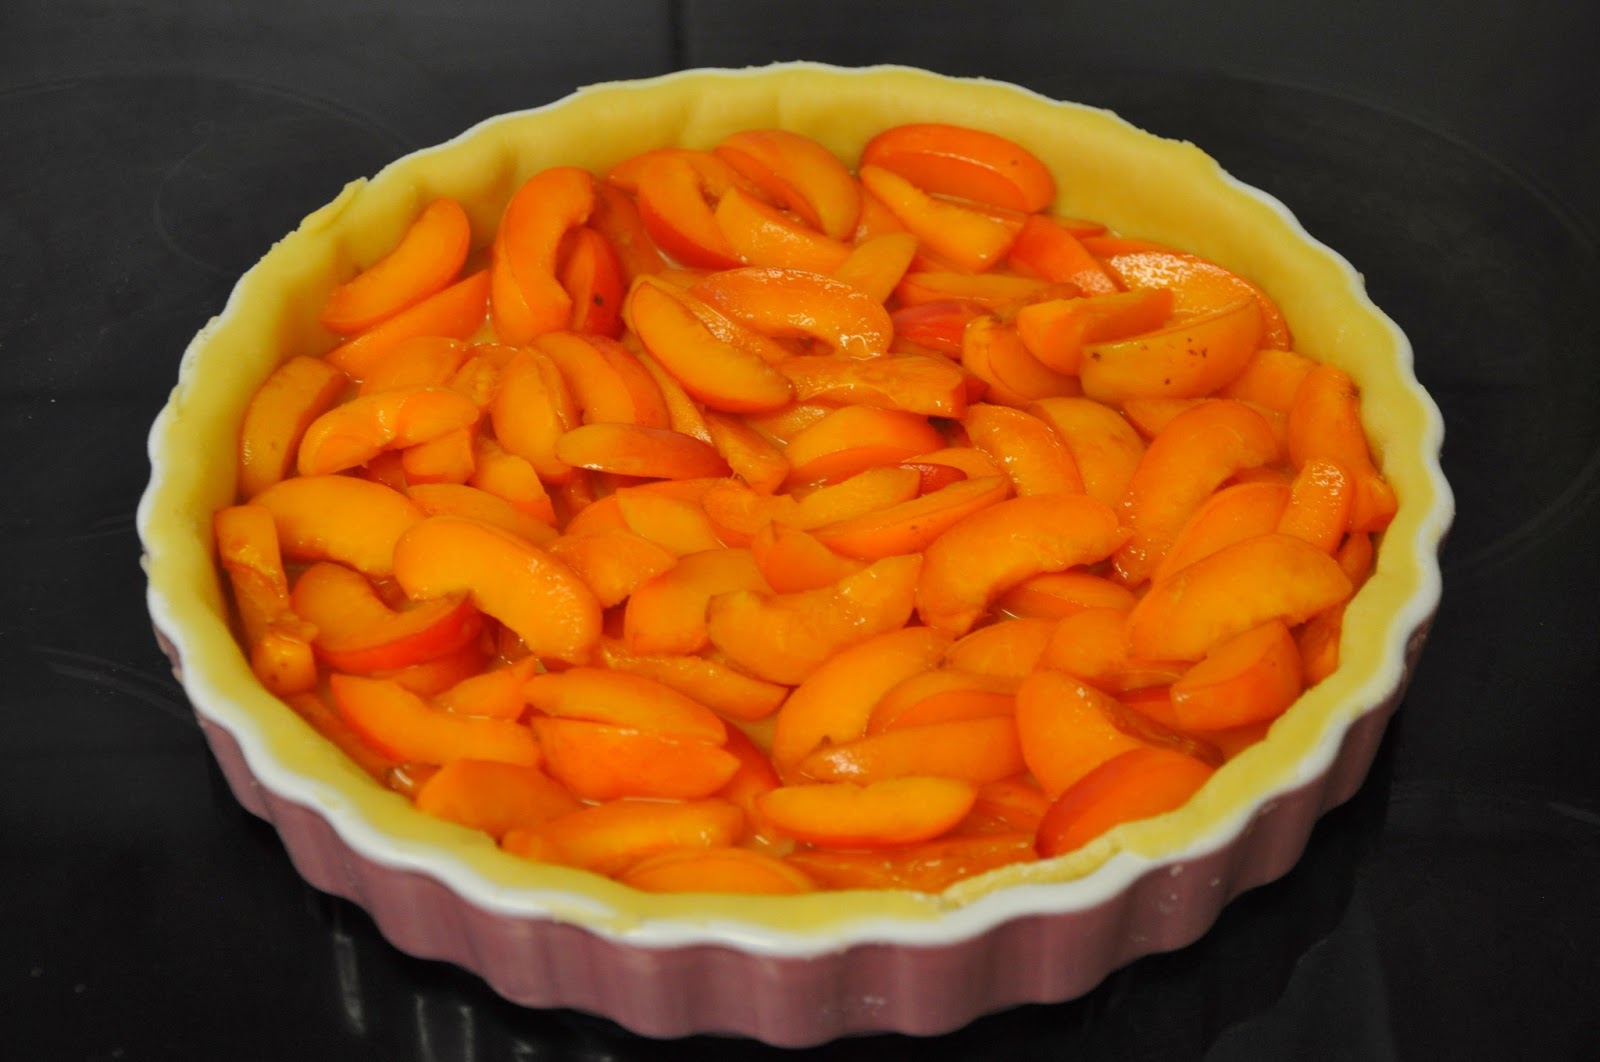
Apricot tart

Yeyyy! Another delicious tart on the blog! Hope you like tarts, cause I'm crazy about them  and I decided to try lots of them this summer. With all these fresh fruits around me it's almost impossible to resist. This time I made apricot tart. Let me tell you a little secret: apricots are my fav fruits in cakes and tarts. You just try it once and you'll love them!
My fresh  and delicious  fruits
Ohhh! Don't even bother buying the tart dough. This one is so simple to do and it really makes the difference. You'll see!

Here is the recipe step by step.

INGREDIENTS:
Sweet tart dough
·         1 ½ cups of all-purpose flour
·         2 tablespoons sugar
·         A pinch of salt
·         1 stick of butter (4 ounces), cut into small pieces
·         1 egg

·         2-3 tablespoons cold water

Apricot filling
·         4 cups of finely sliced apricots
·         ½ cup sugar, adjust to taste
·         1 tablespoons orange juice
·         4 tablespoons of tapioca or corn starch


DIRECTIONS:

Sweet tart dough preparation
1.  Combine the flour, sugar and salt in a food processor and mix.
2. Add the butter pieces, in batches, and pulse until mixed.


3. Add the egg and the water, 1 tablespoon at a time, until clumps of dough start to form.

4. Remove the dough from the food processor and knead it gently.
5.  Mold the dough into a flattened thick disc, and chill in the refrigerator for at least 30 minutes.
6. On a floured sheet of wax paper, roll out the dough into a thin sheet that is a couple inches larger than the tart pan you plan to use – it’s okay if it extends beyond the edges of sheet of wax paper.

7.  Carefully flip the wax paper and the sheet of rolled pastry dough on to a lightly greased tart pan.

 8. Gently press the dough with your fingers onto the mold, start at the center and move outward. Use a rolling pin to roll over the edges and remove any excess dough from the edges. If you want you can leave a ½ - 1 inch to wrap around the edges of the pan – this will help prevent the crust from shrinking.
9. Prick the tart shell with a fork and let it rest in the refrigerator for at least 30 minutes or until ready to use.
 Optional: From the remaining dough you can make all kind of different shapes (I did squares) and use them later, after you add the fruits.  
 Apricot filling
10.  Put the sliced apricots in a bowl, add the orange juice, sugar and tapioca or corn starch. Mix well and let rest for at least 30 minutes, stirring every once in a while. 
11.  Pre-heat the oven to 400F / 200C.
12. Pour the apricot filling into the tart. 
Optional: I decorated it with the squares made earlier.

13. Place it in the pre-heated oven.
14. Bake the tart for about 35-40 minutes or until the crust is golden.
15. Serve alone or with vanilla ice cream or creme fraiche.
 I served my tart with home made vanilla ice-cream. The recipe soon on the blog :)
My home made vanilla ice-cream
 

Happy baking!

Photos by EMI TRASNITU

marți, 2 iulie 2013

Strawberry rhubarb tart

I know that is supposed to be a blog with cupcake recipes only, but once in a while I try these amazing recipes and I would love to share them with you. And this is one of them! Strawberry rhubarb tart :D
I dont't know about you, but I am a tart lover. I love fruits and every dessert you can make with them. Tarts are my favorites since I was little.

Now, rhubarb is quite new for me. I have discovered it 2 years ago in Jamie's Oliver recipes. I just love his recipes with rhubarb. And for some time I found out that is great in tarts because it gives the sour element I'm looking for. If you're a fan of it you can try the rhubarb jam. It's amazing :)

This recipe is really nice. Nice, easy and delicious! You make it from scratch  and with fresh fruits. Please don't buy the frozen dough. This one is so simple to make and it's all worth it ;)

Here is it!

INGREDIENTS:

Sweet tart dough
  •  1 ½ cups of all-purpose flour
  •  2 tablespoons sugar
  •  A pinch of salt
  •  1 stick of butter (4 ounces), cut into small pieces
  •  1 egg
  •  2-3 tablespoons cold water
Rhubarb strawberry filling
  •  2 cups of diced rhubarb, about 10 oz or 2-3 stalks
  •  2 cups of diced strawberries, about 12 oz
  •  ½ cup sugar, adjust to taste
  •  1 tablespoons lemon juice
  •  4 tablespoons of tapioca or corn starch

To serve

  •  Vanilla ice cream or creme fraiche


DIRECTIONS:

Strawberry rhubarb filling 

1. Combine the diced rhubarb and strawberry in a bowl, add the lemon juice, sugar and tapioca or corn starch. Mix well and let rest for at least 30 minutes, stirring every once in a while. 
Sweet tart dough preparation 

2. Combine the flour, sugar and salt in a food processor and mix.

3. Add the butter pieces, in batches, and pulse until mixed.

4. Add the egg and the water, 1 tablespoon at a time, until clumps of dough start to form.

5. Remove the dough from the food processor and knead it gently.

6. Mold the dough into a flattened thick disc, and chill in the refrigerator for at least 30 minutes.

7. On a floured sheet of wax paper, roll out the dough into a thin sheet that is a couple inches larger than the tart pan you plan to use – it’s okay if it extends beyond the edges of sheet of wax paper.

8. Carefully flip the wax paper and the sheet of rolled pastry dough on to a lightly greased tart pan. Gently press the dough with your fingers onto the mold, start at the center and move outward. Use a rolling pin to roll over the edges and remove any excess dough from the edges. If you want you can leave a ½ - 1 inch to wrap around the edges of the pan – this will help prevent the crust from shrinking. 
9. Prick the tart shell with a fork and let it rest in the refrigerator for at least 30 minutes or until ready to use.

Baking the tart

10. Preheat the oven to 400F / 200C.

11. Pour the rhubarb strawberry filling into the tart and place it in the preheated oven. 
12. Bake the tart for about 35-40 minutes or until the crust is golden. 
Serve alone or with vanilla ice cream or  creme fraiche. 
 Envoy this great summer treat!

Photos by EMI TRASNITU

duminică, 30 iunie 2013

The perfect vanilla cupcake


For some time I have been searching for the perfect vanilla cupcake recipe.
I've tried several recipes, but none made me say ''This is the one!''. Too crumbly, too dry, nothing special, taste like bread, etc. And since I tried the Black Forest cupcakes recipe and I loved it, I decided to try it on vanilla version ( I replaced the cocoa with flour) and the result it's simply amazing.
The cupcakes are so moist and they just melt in your mouth. It's like you're eating a small cloud!
If you're looking for a great vanilla cake/ cupcake recipe, then look no more. Here is it! Just try it! It's to die for!!!
And to go with my perfect vanilla cupcakes, I made a nice buttercream frosting. Now this is the part I enjoyed the most. I made it on three different colors and I piped it with three different tips, so you can see the differences between them.
I love using plastic bags when frosting with different colors
The recipe for vanilla cupcakes.

INGREDIENTS:
  • 120 g plain or all-purpose flour
  • 120 g caster sugar
  • 1 ½ tsp baking powder
  • a pinch of salt
  • 40 g unsalted butter, softened
  • 1 tsp vanilla extract
  • 120 ml milk
  • 1 egg

For buttercream frosting recipe go here .
To color your frosting add as much dye as you want, till you reach the desired color.


DIRECTIONS:
Preheat your oven to 170C/ 325F/ GM 3 and line a cupcake tin with medium sized paper cases.

Sieve the flour, sugar, baking powder, salt and butter into the bowl of a Kitchen Aid (or other freestanding mixer)  and using the paddle attachment mix slowly until everything is combined and you have a sandy consistency.

While the mixer is running, slowly pour in half of the milk and mix until it's just incorporated. 

Add the egg to the remaining milk along with the vanilla and continue beating until it's mixed in. 

Scrape down the sides of the bowl to make sure everything is properly mixed but be careful not to over beat the mixture.
Evenly spoon the cake mixture into the cupcake cases and bake for 20-25 minutes until the sponge bounces back when touched (with my oven 17 minutes works perfectly) and a skewer comes out clean with put into the center of the cake.
Leave to cool for a few minutes then transfer the cupcakes onto a wire rack. 

My cupcake, ready to be decorated
Let cool completely and frost before serving.


Let me know how your cupcakes went! Happy baking!
My working table

I decorated one cupcake with all three colors and different tips

Pink frosting -  I used a  CLOSE STAR
Orange frosting  - I used a FRENCH  TIP

Blue frosting - I used a ROUND TIP


Photos by EMI TRASNITU

luni, 24 iunie 2013

Black forest cupcakes

Cherries, cherries , cherries! And chocolate!

I have been waiting for cherries all this time. I remember when I was little and my grandma was having this big cherry tree and every single year was so full. And the cherries were so delicious! They were really special, not red, but a nice combination of yellow and orange (as you can see in the picture).

The idea of making these cupcakes came to me after a friend's birthday party, when she had not one, but two Black Forest cakes. The cakes were simple delicious. Nice and moist,  full of cherries and shredded chocolate on top.
Now, these cupcakes are simply amazing. The recipe is definitely a keeper and I'm so happy that I found it.
The batter just melts in your mouth. It's so rich and moist, and it's smells incredibly.
The recipe was with cherry jam, but I preferred to mix some cherry compote with corn starch and the result is very nice. I did this because I like to feel the hole cherry when I bite out of the cupcake.
But you can go for cherry jam, just be careful with the amount of sugar used in the batter, at the end is possible to be very sweet.

And now the great recipe I tried.

INGREDIENTS:

FOR CUPCAKES:

  • 100 g plain or all-purpose flour
  • 20 g cocoa powder
  • 140 g caster or berry sugar
  • 1 ½ tsp baking powder
  • a pinch of salt
  • 40 g unsalted butter, softened
  • 1 tsp vanilla extract
  • 120 ml milk
  • 1 egg

FOR FILING: 

  • 4 tbsp (12 tsp) cherry jam

or

  • cherry compote (2-3 cherries  per cupcake and 60 g of liquid)
  • 1 teaspoon corn starch

FOR FROSTING:                          

  • 300 ml double or whipping cream
  • ½ tsp vanilla bean paste or vanilla extract
  • 1 tsp sugar (or to taste)

TO DECORATE:

  • 12 fresh cherries
  • shredded chocolate


DIRECTIONS:

Preheat your oven to 170C/ 325F and line a cupcake tin with medium sized paper cases.
Sieve the flour, cocoa, sugar, baking powder, salt and butter into the bowl of a Kitchen Aid (or other freestanding mixer) and using the paddle attachment mix slowly until everything is combined and you have a sandy consistency (if you don't have a Kitchen Aid use a hand-held electric beater).
While the mixer is running, slowly pour in half of the milk and mix until it's just incorporated.
Add the egg to the remaining milk along with the vanilla and continue beating until it's mixed in.
Scrape down the sides of the bowl to make sure everything is properly mixed but be careful not to over beat the mixture.
Evenly spoon the cake mixture into the cupcake cases .
Bake for 20-25 minutes until the sponge bounces back when touched and a skewer comes out clean with put into the center of the cake.
Leave to cool for a few minutes then transfer the cupcakes onto a wire rack.
Once the cupcakes have cooled scoop out a little of the center. I use an apple corer as I find it works perfectly, however you could easily just use a small knife or teaspoon.
Fill the center of each cupcake with a teaspoon of the cherry filling that you choose.
Once you are ready to serve the cupcakes put the cream, vanilla and sugar in a large bowl and whip until soft peaks that hold their shape.
Frost the cream onto each cupcake and then using a vegetable peeler shave over some chocolate before finishing with a cherry on top!

*The cupcakes can be made a day or two in advance, however the cream won't keep on them so only add the cream when you are ready to serve.


Photos by Emi Trasnitu