vineri, 16 august 2013

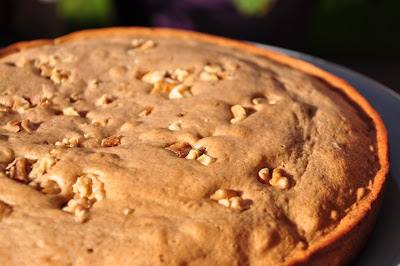
Fig and honey cake

Happy name day to all  women named Maria! Especially to my dear mother!
Today I wanted to celebrate my mom with a nice and special cake with all the ingredients that she loves: figs, honey, nuts, cinnamon and mascarpone.
And so,  I decided to try this cake recipe which  is easy to make are really quick. But most of all, delicious!

Here is a recipe that I found and adapted specially for my mommy's taste . You can change the filling with ricotta, you can add raisins or add your favorite nuts. Feel free to improvise and let me know how it went :)
INGREDIENTS: 


For cake:

  • ½ cups all-purpose flour
  • 1 teaspoon baking powder
  • ½  teaspoon baking soda
  • ½ teaspoon salt
  • 1 cup sugar
  • 3  eggs
  • ½ cup olive oil
  • ¼ cup milk
  • 3 tablespoons cinnamon
  • 1 hand full of nuts

For filling:

  • 1 ½ cups mascarpone cheese
  • 3 tablespoons runny honey

To decorate:

  • runny honey
  • 4 big figs

INSTRUCTIONS:

Preheat the oven to 350 F/ 170 C and oil an 8-inch square pan.
To prepare the cake, whisk together flour, baking powder, baking soda , salt and cinnamon.
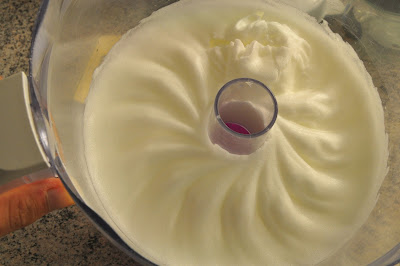
Combine sugar and eggs. Beat with an electric mixer a medium-high speed until fluffy, about 3 minutes. 
Reduce speed to low, and add olive oil and then milk in a slow stream.
Add flour mixture and stir just until combined. 
Rough fully chop the nuts and add half in the mixture.
Pour the batter into prepared pan and on top put the other half of nuts.
Bake for about 35 minutes or until  a knife inserted in the center comes out clean.
Let cool completely.
In a bowl mix mascarpone cheese with honey.
Cut the cake into 2 equals parts.
Arrange  one part on your cake stand and pour over the mascarpone mixture. Using a knife or a spatula spread it evenly.  
Add the second part of the cake on top.
Drizzle with runny honey as much as you like and then decorate it with quarters of figs.


PHOTOS BY Emi Trasnitu.

vineri, 9 august 2013

Brownie with apricots

I'll start this post by saying that this is a great recipe and you really have to try it. It's moist and chocolaty  and the half apricot in each portion gives a special taste to your brownie. It's heaven!
I found it on a Romanian  blog  and I'm happy that I tried it.
Apricots are one of my favorite fruits in desserts. They really give a special aroma and a nice color.
Brownies are not that special, but if you try this version you'll be pleased with the result.
And with this design you'll amaze everyone.
Here is the recipe that I found and tried. 

INGREDIENTS:
  • 200g  white flour
  • 200g sugar
  • 160g butter
  • 4 eggs
  • 8 tablespoons cocoa
  • 4 tablespoons  shredded chocolate
  • 280 g yogurt
  • ½ teaspoon  baking powder
  • 3 apricots
  • A pinch of salt
  • 2 tablespoons brown sugar
  • Cooking spray / butter

DIRECTIONS:

Preheat your oven to 375 F / 170 C.
Coat the baking tray with cooking spray or butter and spread the brown sugar.
Cut the apricots in half and take out the core.
Place the half apricots facedown and try to keep an equal distance between them.
Using a Kitchen Aid , mix the butter with sugar for 2 minutes.
Separate the egg whites from yolks.
Add egg yolks  one by one to the butter and sugar mixture.
In a separate bowl mix together flour, cocoa and baking powder and add it gradually to the butter mixture.
Add yogurt and shredded chocolate.
Separately beat the egg whites with the pinch of salt.
Using a spoon or spatula add slowly  the beaten eggs whites to the butter mixture.
Carefully pour the mixture into the baking tray, trying not to move the apricots.
Bake the brownie for 35- 40 minutes.
Try not to over bake the brownie because it can get really dry.
Leave it cool completely on the tray.
When it’s ready, turn the brownie upside down on another tray and try to cut equal squares having the apricots in the middle. If needed, cut the edges with a knife.
Decorate the each brownie with fresh mint leaves. 


PHOTOS BY EMI TRASNITU

miercuri, 7 august 2013

Mini fruit tarts - berries and vanilla

It's been a while since my last post, but I've been soo busy these days. My big day is almost 3 weeks apart and I have to spend more time focusing on it.
Recently I've been in a short holiday to Italy, from where I bought nice little tart tins. I could't wait to get home and try them. One of my favorite desserts are mini tarts.  
I love mini tarts because they are so easy to make and really delicious.  And because they are so colorful they work on every occasion. Imagine them on a brunch ;)
The tart shell can be used as the foundation for many desserts. The part that I like the most is that you can simply press the dough into the tart pan with your hands and not use a rolling pin (sometimes after using the rolling pin the dough is too thin and is so hard to put it on the pan). Another great thing is that you can make double quantity and store half of it in the freezer up to one month.
Here is the nice recipe that I found. Try it and let me know what you think :)

INGREDIENTS:

For Tart Shell - for 10 mini tart shells


  • 6 tablespoons (3oz. or 85 grams) unsalted butter, at room temperature
  • 1/4 cup sugar
  • 1 large egg yolk
  • 1 cup all-purpose flour
  • 1/8 teaspoon salt


For filling - I used vanilla pudding. Just follow the instructions on the package.

For decorating- I used fresh raspberries , blackberries and green mint.


DIRECTIONS:

Put butter and sugar in the bowl of a stand mixer fitted with the paddle attachment.
On low speed, beat for about a minute until the mixture is smooth and combined. 
Add egg yolk and beat for half a minute.
Then add flour and salt (all at once) and beat until the dough just begins to come together. Avoid over mixing.
Divide the dough into 10 little balls.
Next, just take one by one the dough balls and place them in the center of your tart tins and start pressing them down and around with your fingers, making them as even as you can.
Avoid making the corners too thick
The dough is soft and moist, very easy to press and spread around.

Freeze the tarts for at least an hour. (You can be keep the dough frozen for a month)
On the day you are ready to use it, preheat the oven to 375 degrees. 
Take the frozen tart shells and poke them with a fork a few times.
Bake the tart shells in the oven for 10 to 15 minutes or until it reaches a  golden brown.
If  browning too fast and you can use  a little foil to cover up in the last few minutes.

My tart shells . I just took  them out of the oven
After the tart shells are cooled completely, fill them with  1-2 tablespoons of vanilla pudding (follow the instructions on the package) and then decorate them with berries and fresh green mint.
Enjoy!


Baby Thomas watching where mommy puts those yummy tarts


Photos by Emi Trasnitu
.